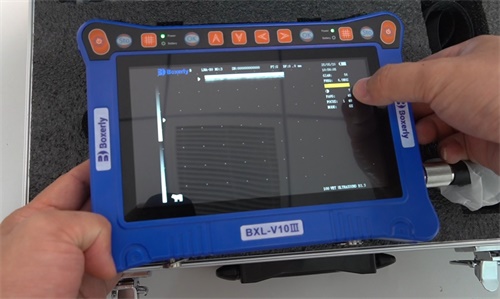
As a livestock farmer with a deep interest in veterinary diagnostic tools, I’ve come to rely on ultrasound imaging as an essential part of animal healthcare management. Understanding how to properly adjust imaging parameters is vital not only for accurate diagnoses but also for improving the efficiency of veterinary operations. In this article, I will explore the key imaging parameter adjustments in Veterinary ultrasound, drawing from practical experience and real-world application, especially focusing on B-mode and M-mode imaging systems. This article will also explain how these adjustments work in modern ultrasound systems and why they are critical in achieving high-quality diagnostic images.

The Importance of Imaging Parameter Adjustment
Veterinary ultrasound imaging, particularly using B-mode (brightness mode), offers real-time visualization of internal structures. However, the quality of these images greatly depends on precise control of various imaging parameters. Unlike general photography, ultrasound imaging doesn’t simply rely on "point and shoot." It demands systematic optimization to capture useful, diagnostic-quality images—especially when dealing with livestock where variations in body size, organ depth, and movement are common.
These adjustments are not just preferences; they are a necessity for professionals to interpret internal anatomy and pathology accurately. A poorly optimized image can lead to misinterpretation and missed diagnoses, impacting the health outcomes for animals under care.
Key Imaging Parameters in B-Mode Ultrasound
In my experience, effective use of B-mode imaging involves several core parameters:
Dynamic Range
This controls the range of gray shades in an image. A wider dynamic range allows subtle differences in tissue echogenicity to be displayed, providing a more detailed image. However, it can sometimes reduce contrast, so adjusting it correctly is a balance between detail and clarity.Overall Gain (General Optimization)
Gain affects image brightness. Too much gain results in a washed-out image; too little, and structures may be invisible. Proper adjustment ensures a balanced view of soft tissues and organ boundaries.Dual Image Display (Split Screen)
Dual imaging enables comparison of live images with reference images or previously saved frames. This is useful during follow-up exams to monitor changes in conditions like ovarian cycles or abscess development.Gray Map Transformation (Grayscale Mapping)
This refers to how gray levels are assigned to echo intensities. By changing the gray map, different tissue characteristics can be highlighted or suppressed, which helps in visualizing certain pathologies more clearly.Tissue Harmonic Imaging (THI)
THI is a technique where the ultrasound system processes echoes at twice the transmitted frequency. This reduces noise and artifacts, particularly useful in imaging deeper structures or large animals such as cattle and horses.
These parameters are typically adjusted through software interfaces, but in most veterinary systems, the underlying functionality is managed by low-level hardware. The upper software layer—what we interact with—merely sends protocol instructions and receives the adjusted video data.

M-Mode Imaging Parameters
M-mode (motion mode) imaging is especially useful in cardiac evaluations, commonly applied in echocardiography. In farm animals, this mode assists in evaluating heart valve function and cardiac chamber dimensions. The most important adjustable parameters here include:
Sweep Speed (Scan Speed)
Controls how fast the M-mode image is displayed. Higher speeds are good for analyzing rapid heart movements, while slower speeds offer detailed evaluation of valve cycles.Dynamic Range and Gray Mapping (Same as B-mode)
Just like in B-mode, image clarity can be adjusted by managing the range of gray shades and how these shades are displayed.
M-mode images require high temporal resolution, and achieving this depends on how precisely these parameters are tuned in synchronization with the animal’s heart rate and condition.
The Role of TGC, Depth, and Focal Zone Adjustments
In practical field use, there are three more tactile controls that play a major role in image optimization:
TGC (Time Gain Compensation)
This allows adjustment of gain at specific depths. For example, the top of the image may need less gain, while deeper tissues require more. TGC sliders on the control panel let the user adjust these manually in real-time.Depth Adjustment
Controls how deep the ultrasound beam penetrates. For large animals like cows or pigs, you might need to increase the depth to visualize the uterus or liver. However, increasing depth often decreases image resolution, so it must be adjusted with care.Focal Zone Adjustment
Determines where the ultrasound beam is most sharply focused. Correctly placing the focal zone at or near the region of interest can dramatically enhance image clarity.
These controls are often hardware-based, using physical keys or knobs on the console. The system’s software reads these inputs and invokes corresponding low-level functions to adjust the ultrasound signal accordingly. From a user’s perspective, it feels instantaneous, but there is a sophisticated process behind the scenes.
Integration of Software and Hardware in Image Optimization
Veterinary ultrasound systems are designed with a layered architecture. The bottom layer (hardware) handles signal acquisition and processing. This includes analog-to-digital conversion, real-time filtering, and transmission of video data. The upper layer—the application software—acts as the interface between the user and the hardware. It is responsible for:
Sending parameter change requests (e.g., adjusting THI, dynamic range).
Receiving the processed image data.
Displaying real-time imaging results.
This separation allows the system to remain fast, efficient, and adaptable to different imaging tasks across species and conditions.
Practical Considerations in Farm Environments
Using ultrasound in a barn or on pasture comes with challenges. Lighting conditions, animal movement, and power availability can all affect scan quality. That’s why being able to quickly adjust parameters on the go is vital. For example, when scanning a pregnant mare or sow, adjusting the depth and focal zone efficiently can mean the difference between spotting a fetal heartbeat or missing it altogether.
Moreover, dual-image comparison is incredibly helpful during repeat evaluations for reproductive cycles or infection monitoring. It allows me to determine whether treatment is working, or whether an intervention is necessary.
Conclusion
The ability to optimize veterinary ultrasound imaging parameters is not just a technical skill—it’s an essential aspect of animal healthcare. Whether it’s adjusting dynamic range for a clearer fetal view or fine-tuning TGC to visualize a deep abscess, each parameter plays a role in the bigger picture of accurate diagnostics. As a livestock farmer, mastering these adjustments has helped me collaborate more effectively with veterinarians and ensure better outcomes for my animals.
A high-quality veterinary ultrasound image doesn’t come from the machine alone; it comes from an informed operator who understands the interplay between hardware, software, and biological variables. Knowing how to adjust each setting, and when, is key to unlocking the full diagnostic potential of this essential technology.
References:
Nyland TG, Mattoon JS. Small Animal Diagnostic Ultrasound. Elsevier, 2014.
Veterinary Imaging Guidelines, American College of Veterinary Radiology
Practical Ultrasound Use in Bovine Reproduction. Journal of Dairy Science.
tags:
Text link:https://www.bxlultrasound.com/ns/808.html


