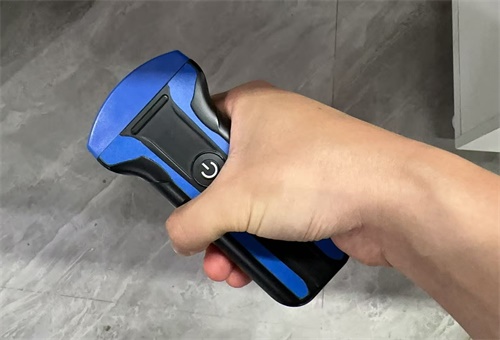
Ultrasound technology has become an essential tool in veterinary medicine. From monitoring livestock pregnancies to diagnosing small companion animals, veterinarians rely on ultrasound machines every day. A key component of this technology is the ultrasound probe, also called a transducer. The probe is the part that comes into direct contact with the animal and sends and receives the sound waves that form the image. Because of its critical role, proper probe inspection is essential to ensure accuracy, safety, and long-term device performance.

What Is Probe Inspection?
Probe inspection is the process of checking an ultrasound probe for any signs of wear, damage, or malfunction. Unlike other parts of an ultrasound system, the probe is frequently exposed to stress: it is moved across animal bodies, sometimes pressed firmly to get a better image, and often cleaned with disinfectants that can degrade the materials over time. Regular inspection ensures the probe maintains its imaging quality, prevents patient injuries, and avoids inaccurate readings that could affect treatment decisions.
During inspection, veterinarians or technicians check the probe surface for cracks, tears, or worn-out areas. They also verify the cable integrity and connection points. Some clinics use specialized testing equipment to measure the probe’s acoustic output and imaging performance. Even small defects can cause image artifacts or reduce the clarity of critical diagnostic information.
Common Problems Detected During Probe Inspection
Veterinary probes face unique challenges because animals vary widely in size and behavior. Some common problems include:
Surface Damage: Small cracks or worn areas on the probe face can alter the transmission of sound waves.
Cable Wear: Repeated bending and handling can damage internal wires, leading to intermittent signal loss.
Connector Issues: Loose or corroded connectors may produce image distortion or intermittent operation.
Acoustic Degradation: Over time, the transducer materials may degrade, resulting in reduced image resolution.
Regular inspection helps identify these issues early, preventing potential harm to animals and avoiding costly repairs.
Step-by-Step Probe Inspection Process
A thorough probe inspection involves several key steps. Here’s a simple overview:
Visual Examination: Inspect the probe surface, cable, and connector for obvious damage.
Physical Test: Gently bend the cable and rotate the probe to check for signal interruption.
Cleaning Check: Ensure the probe surface is free of residue that might interfere with image quality.
Image Test: Connect the probe to the machine and scan a test object or phantom to evaluate image clarity.
This process may vary depending on the type of probe and the species of animal being scanned, but following a consistent inspection routine helps maintain high standards of care.
Why Regular Probe Inspection Matters
Neglecting probe inspection can have serious consequences. In veterinary medicine, inaccurate ultrasound images may lead to misdiagnosis, missed pregnancies, or delayed treatment. For example, in large animals like cows or horses, misreading fetal development can affect breeding decisions and economic outcomes. In small animals, poor image quality might obscure organ abnormalities, delaying critical interventions.
Regular inspection not only ensures diagnostic accuracy but also prolongs the life of the probe. Ultrasound probes are expensive, and preventing damage through routine checks is far more cost-effective than replacing a damaged unit.
Differences in Probe Inspection Across Animal Types
Probes used for different species require tailored inspection practices. Small animal probes used on dogs or cats often have higher-frequency ranges to provide detailed images of tiny structures. Large animal probes, like those for cattle or horses, need to penetrate deeper tissues. The inspection routine must account for these differences:
| Animal Type | Probe Frequency | Inspection Focus | Common Issues |
|---|---|---|---|
| Small Animals (Dogs, Cats) | 7–12 MHz | Surface integrity, image clarity | Surface scratches, minor cable wear |
| Large Animals (Cattle, Horses) | 2–5 MHz | Deep tissue penetration, cable strength | Cable bending, connector stress, surface cracks |
| Exotic/Wild Animals | Variable | Durability, adaptability to irregular shapes | Surface wear, irregular imaging artifacts |
This table highlights why inspection routines cannot be one-size-fits-all. Understanding the animal and probe specifications is critical for maintaining imaging quality and patient safety.
Best Practices for Probe Maintenance
Inspection is closely linked with maintenance. Some best practices include:
Always clean probes according to manufacturer guidelines. Avoid harsh chemicals that can degrade materials.
Store probes in protective cases when not in use to prevent accidental drops or pressure damage.
Schedule periodic professional testing for acoustic performance, especially for high-use probes.
Keep records of inspections and maintenance to track probe condition over time.
Following these practices ensures both reliable imaging and the longevity of the equipment.
Conclusion: Probe Inspection as a Vital Routine
Probe inspection is not optional—it is an essential part of Veterinary ultrasound practice. By regularly checking the condition of probes, veterinarians can guarantee accurate imaging, safeguard animal welfare, and extend the lifespan of expensive equipment. From small dogs to large farm animals, understanding the specific needs of each probe and following a consistent inspection routine is key to successful veterinary diagnostics.
tags: Probe Inspection
Text link:https://www.bxlultrasound.com/ns/887.html


